

There are as many techniques to retouching eyewear as it is variations of eyewear. The correct one doesn’t exist. But there are a few useful tricks along the way.
If you are shooting sunglasses, one thing is undoubtedly a problem. The flash will completely obliterate the glass. They WILL be transparent. Even if they are pitch black. You have two ways to go here; Take two shots. One with flash, and one without, to later merge the two pictures. The other thing is to shoot with flash, and later correct the problem in Photoshop™. In this example I used the later.
Another useful thing is to use a tripod. Maybe it’s a bit obvious, but you’re going to want to have the exact same angle on your pictures.
Use a light-cube. This will minimise the reflections, but sadly not remove them completely. That’s done in Photoshop™.
In Photoshop™ in close-up you will sEe dust particles. Everywhere. Even if you have been efficient before using a clean cloth and a blower. Small tip, use a can of compressed air to remove dust. I found it to be a great solution for minimising the job of removing dust.
You’re also going to see reflections in the glass, and also reflections in the table. Your job is now to make the glass look as real as possible. Beware. It’s hard. But not impossible. I find it much easier with a Wacom™ board than with a mouse.
Before the retouching is done, beware of this trick along the way; Make sure the frames are straight and your picture is shot as straight as possible. Straighten up the image in Photoshop™ if it is needed. Most eyewear has almost identically left and right sides. Therefore, retouch only one side. Then copy one side, flip it, paste it. Voila. Both sides are now fixed, and only in half the time.

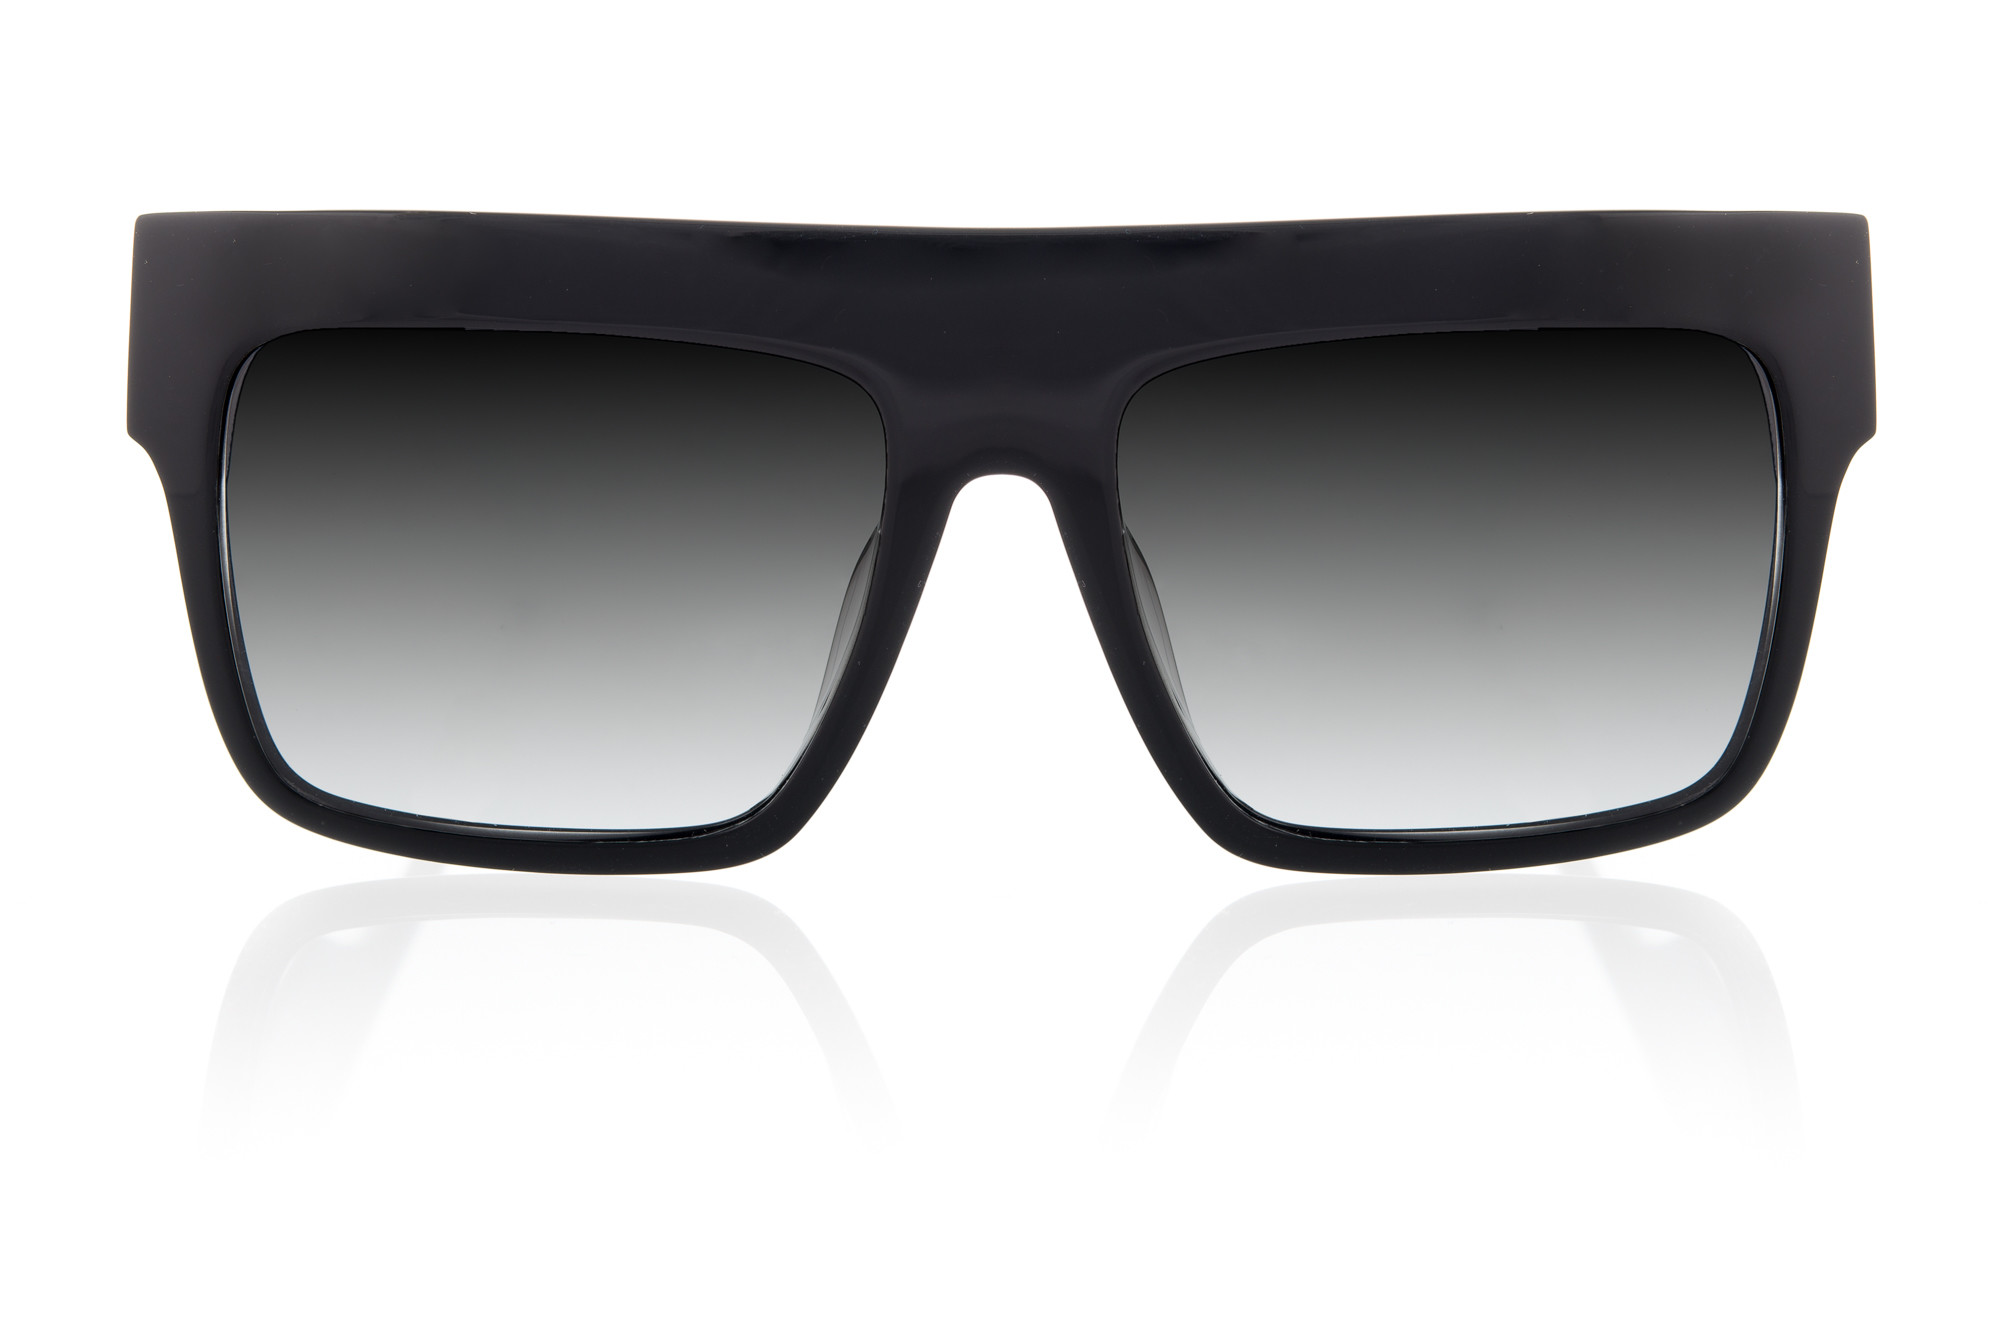
When you retouch the glass you need to ask the customer what they are looking for. With or without reflections? Should you be able to see the sidepieces? The most important thing for the retouching work is to get a realistic feel, even if it’s totally fake. As you can see on my image above, the glass was totally blown away by the flash. I had to rebuild it. The glass in the frames actually have a gradually black/grey tone. When you rebuild a glass try and save as much of the transparency and texture of the glass. Save the reflections on the frames. They will help to make it look real. As you can see on the retouched image below you can still see reflections on the frame, and you can see the nose pads through the glass.
I would really like to share some ideas for tools to use in Photoshop™, but by experience you use different solutions for every single image. Because on eyewear, there are different material, different glass, different colours, different surfaces. Hence, your retouching work is going to be different between every image. My best tip is to think outside the box. You are going to have to come up with solutions along the way. And maybe not in the most logical way.
To not make this a book about retouching in Photoshop™ i’ll stop here. Feel free to come up with tips and solutions in the comments below.
Good luck!
Eyewear design: Anna-Karin Karlsson
Photo: Jonas Hellsén
Project manager during shoot: Fanny Skoglund
Subscribe To TheNewsletter
If you want to be up to date in the photography world, subscribe to my site now! I write blog's, tips & tricks and post news from different companies concerning photography on a regular basis. The reason for asking for your name is to make your newsletter look more personal.
You have Successfully Subscribed!